Ready Set Tmux
Developers love to pine over the newest tools in the toybox. React, Angular, Vue, Gatsby… These frameworks aren’t even new at time of writing, though you could be forgiven for believing they are web development in it’s entirety.
These tools are not bad, but how new or “In Vogue” a tool is, has little to do with it’s usefulness.
My preferred metric when it comes to tooling or frameworks is, “How much does this thing annoy me?”, and is there a more agreeable alternative.
Tmux rates rather well in this regard. It doesn’t annoy me, and it provides some nice functionality. But what is Tmux?

Tmux is a Terminal Multiplexer. Lets gloss over that for now, and be happy that we know what ‘Tmux’ stands for. A popular alternative to the widely known GNU Screen program, If you have experience with that, you should feel right at home with Tmux. If you’ve not used GNU Screen before, don’t worry. We will look at everything you need to get started.
A Tmux session lets you manage multiple screens, each of which can be split further into multiple panes. Sessions will persist until you manually kill them, or the machine hosting them is powered down. It’s also possible for multiple users to connect to the same session. The TV show “Mr. Robot” demonstrates this. Elliot and Darleen frequently communicate via a shared session.
Installing Tmux
You can install Tmux using one of the following commands (presuming you have at lest one of these common package managers available).
sudo apt-get install tmux
sudo yum install tmux
The global configuration file for Tmux is typically found in /etc/tmux.conf but you can also define one in your home directory ~/.tmux.conf. I don’t personally use this file, but many people find it helpful to replace the main prefix keybind that is used in Tmux. If you find it a stretch to hit ‘Ctrl + b’, you can change it to ‘Ctrl + space’ using the code below.
# Change prefix to Ctrl-Space
# It's easier to reach than Ctrl-b
unbind-key C-b
set -g prefix C-Space
bind-key C-Space send-prefix
Ctrl-a is another popular option as that’s what GNU Screen uses by default. For the remainder of this post, I will refer to this combination simply as ‘prefix’. This is because many people do change the default, and it’s easier to read ‘prefix + …’ than ‘Ctrl + b + …’.
Creating a session
Creating a session is straightforward. If you are doing something simple and quick, you can simply type tmux as a command. This will create a new session and open a single screen. If you plan on creating multiple sessions, or plan on sharing your session with someone else, creating a named session is preferred.
# Creates a session
tmux

# Creates a named session
tmux new -s <session-name>
There are a few other commands relating to sessions that we should take a look at. If you are planning to use Tmux via ssh or perhaps even for pair programming, you will need to know how to attach and detatch from sessions. It’s also useful to know how to kill a session.
# Lists sessions
tmux ls

# Attaches to an existing session
tmux attach-session -t <session name or number>

# Kills a specific session
tmux kill-session -t <session name or number>

# Kills all sessions
tmux kill-server
Detaching from your current session is done with the keyboard shortcut ‘prefix + d’. Note that this does not close the session, it simply disconnects you from it. Repeatingly hitting ‘prefix + x’ then ‘y’, will close panes, screens, and eventually kill the session.
Multiple screens
When you start a new session, you will only have one screen to work with. It’s often convenient to have more screen space. Fortunately for us, we can create as many screens as we like. The command to create a screen is ‘prefix + c’. The new screen will be switched to automatically. You can also name the screen you are currently on using ‘prefix + ,’.
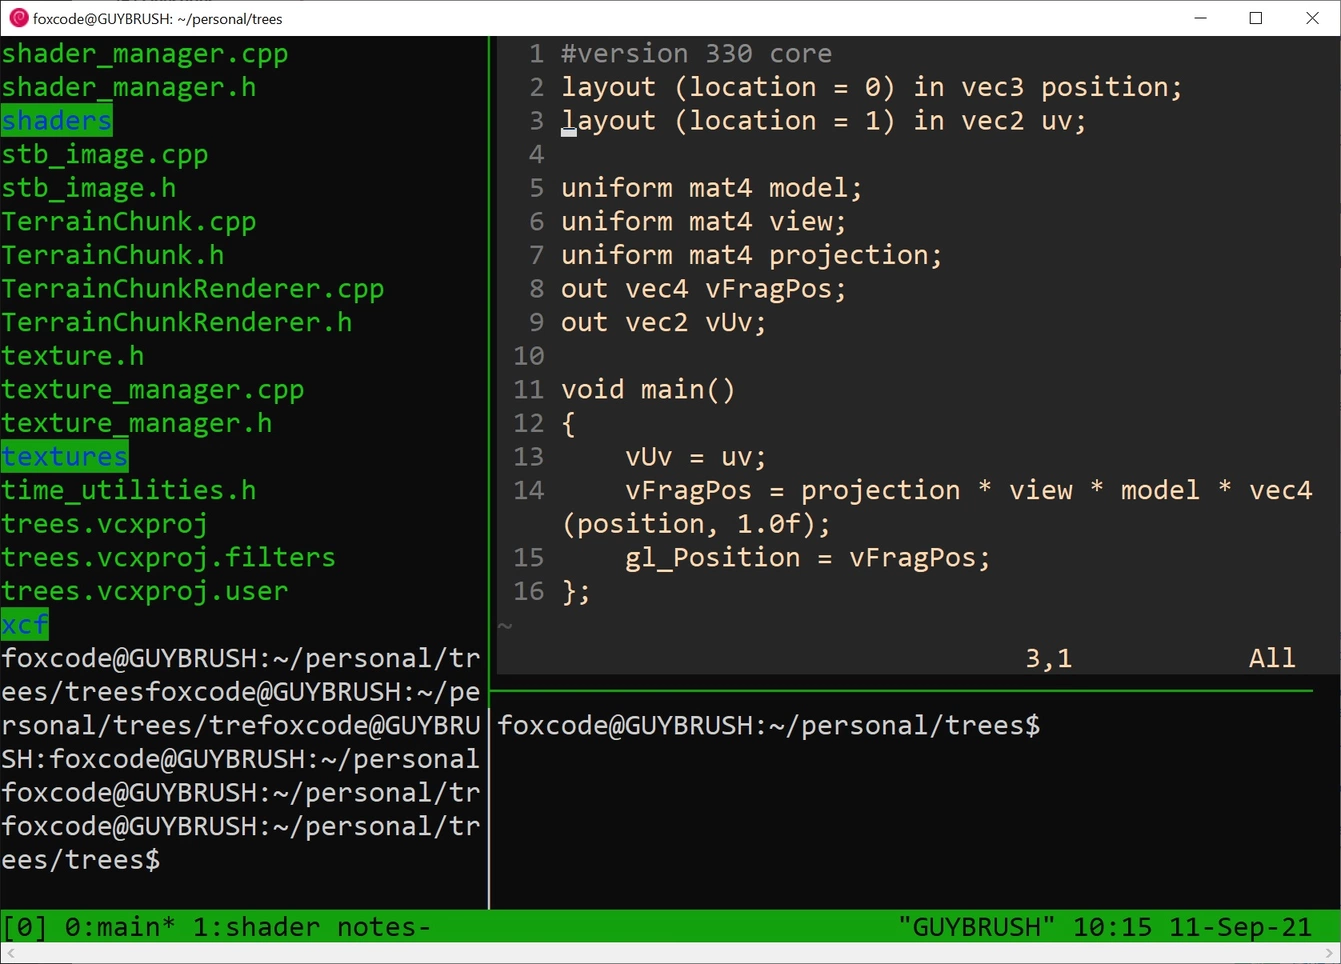
The available screens are displayed in the bottom bar, and an ‘*’ indicates the currently active screen that you are viewing.

You can kill the screen you are currently on using the command ‘prefix + &’.
Switching the current screen, is simply a matter of using the prefix key and the number of the screen you want. In the image above ‘prefix + 0’ woud open screen 0, which was automatically named bash when it was created.
You can also go directly to the next or previous screen using the commands ‘prefix + n’ and ‘prefix + p’ respectively.
Splitting the screen
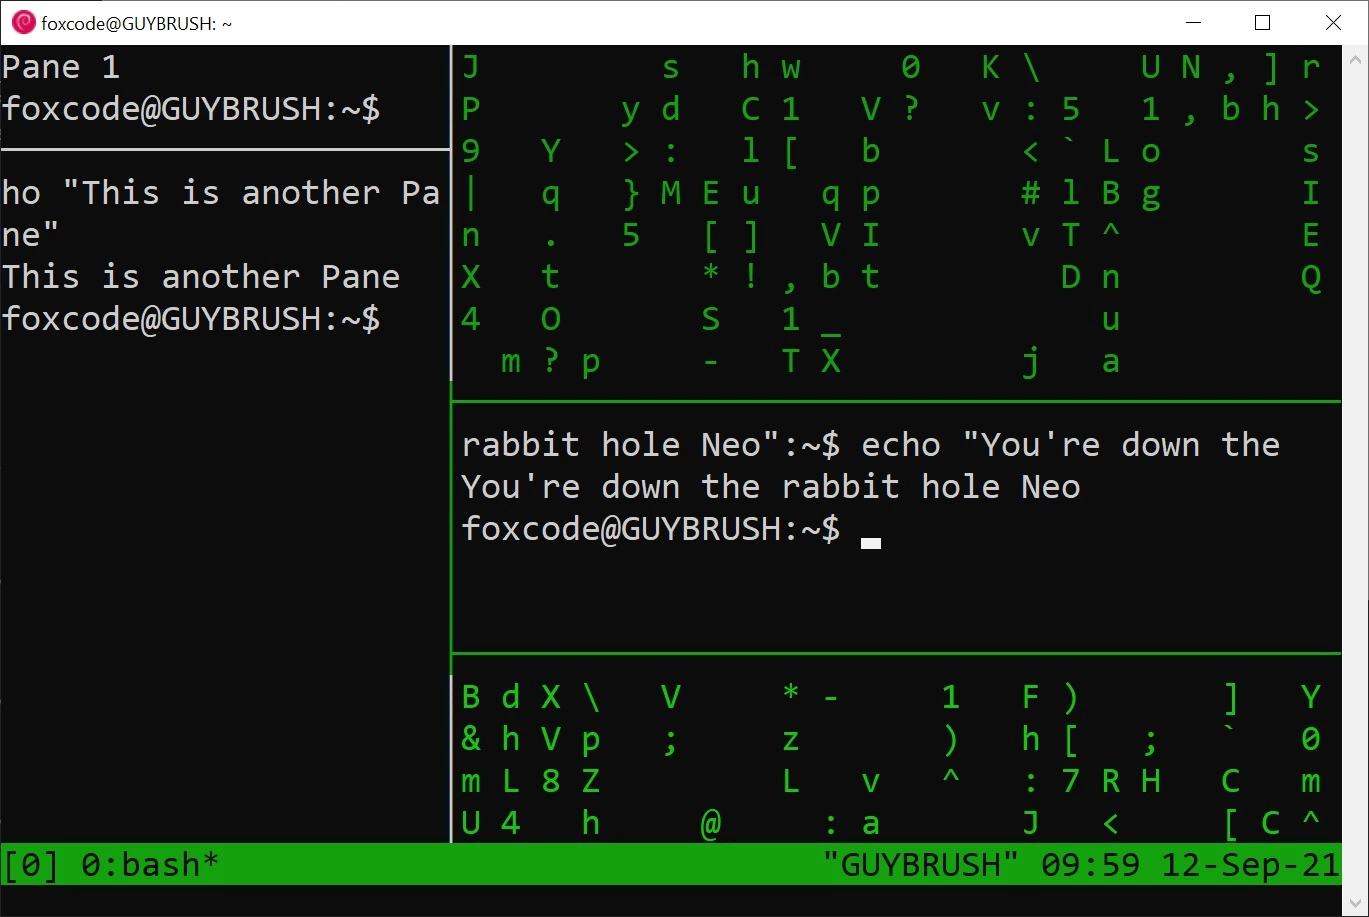
If multiple screens doesn’t get you up in the morning, then you should explore splitting a screen into multiple panes. It’s often convenient to have multiple files or terminals visible at once. Panes make this process painless. I know, I know. I’ve been staring at the computer screen for too long.
You can split a screen into as many panes as you like. However, I’d recommend not going beyond six. A large number of panes just becomes a mess that’s hard to navigate, though it’s sometimes useful if you want to see multiple program outputs at once. I commonly find two or three panes to be the most useful. Beyond that, I typically create a second screen and split that as I please.

Panes are creating by splitting the screen, either horizontally or vertically. ‘prefix + %’ splits the screen vertically. ‘prefix + " ’ splits the screen horizontally.
The above commands apply to the pane you are currently in. Switching panes is done using the prefix and arrow keys. For example, ‘prefix + left-arrow’ would move you one pane to the left. This is another reason why you should keep the number of panes sensible. Navigating a five by five block of arbitrarily sized panes takes time, time that could be better spent online arguing for Vim over Emacs.
You need to be careful with the arrow key commands on panes. The behaviour changes depending on if you are still holding the prefix key or not when you hit the arrow key. Resizing panes is also achieved with the prefix and arrow key, but you must hold the prefix down. You can optionally hold both down to continuously resize the pane. TLDR, switching and resizing panes uses the same commands.
We saw when creating a session that ‘prefix + x’ kills sessions and screens. The same command will first kill the pane you are currently in.
Sharing a session
While Tmux lacks the kind of pair programming functionality available in Visual Studio Code, it’s still sometimes useful to share a session.
Consider the scenario where Chris and Lily are both connecting via ssh to a single machine using the same user account. Chris has created a Tmux session, and is looking puzzled at some config files, he needs Lily’s help.
Lily has a choice. She can connect to Chris’s session, which will effectively mirror their screens, or she can create her own session, and attach it to the same screens Chris is using.
# Attach directly to Chris's session
tmux attach-session -t chris1

# Create a new session but target the same screens
tmux new -s lilysesh -t chris1
In the first case, Lily’s screen will mirror Chris’s. If either of them navigate to a different screen, both of them will see the new screen.
In the second case, either of them can switch to a new screen independently and do work.
This is the simple case. Things get more complex if Chris and Lily are connecting using different accounts on the host machine. To expose one users session to another, we need to specify a socket name when we first create our session.
# Create a session called shared, using socket sock1
tmux -S /tmp/sock1 new -s shared
For this to work, both users need to be in a common group. We will assume this group already exists and is called ‘friends’. We now need to change the socket we created to be owned by this common group.
# Change owner of socket sock1 to the friends group
chgrp friends /tmp/sock1
From this point, any user belonging to the friends group, will be able to access the session.
# Join the session via the socket
tmux -S /tmp/sock1 attach -t shared
Summary
There we have it. Create sessions, screens and panes to your hearts content. There is always more to learn of course, but I hope this guide provides a useful introduction to the basic features of Tmux.
